项目初始化
使用 nest cli 直接搭建即可
nest cli 使用
先安装
1
| npm install -g @nestjs/cli
|
使用命令新建项目
常用命令
1
| nest g <schematic> <name> [options]
|
Documentation | NestJS - A progressive Node.js framework
目录结构最佳实践
可以参考nodepress这个项目的目录结构
环境变量
使用@nestjs/config 来进行环境变量的加载,@nestjs/config 内部使用了 dotenv
先安装 cross-env
1
| pnpm install --save-dev cross-env
|
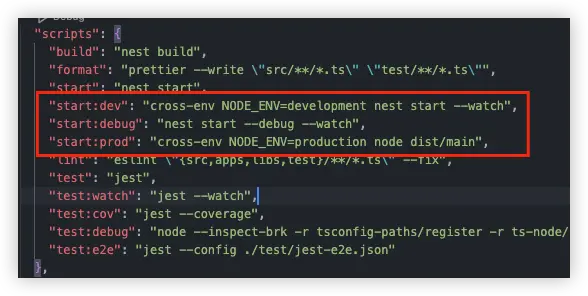
修改一下 package.json 脚本
安装@nestjs/config
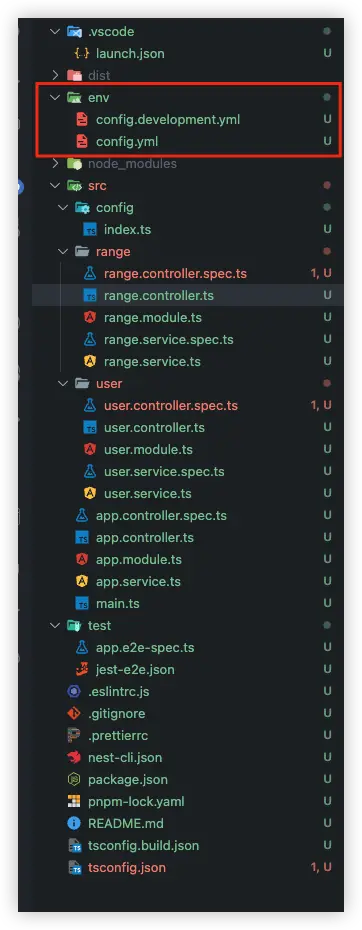
在根目录创建 env 文件夹存放配置文件,一般都是一些 database 的定义
引入
1
2
3
4
5
6
7
8
9
10
11
12
13
14
15
16
17
18
19
20
21
22
23
24
25
26
27
| import { readFileSync } from 'fs';
import * as yaml from 'js-yaml';
import { join } from 'path';
const env = process.env.NODE_ENV;
console.log(env);
const BASE_YAML_CONFIG_FILENAME = `env/config.yml`;
const YAML_CONFIG_FILENAME = `env/config.${env}.yml`;
const baseFilePath = join(__dirname, '../../', BASE_YAML_CONFIG_FILENAME);
const filePath = join(__dirname, '../../', YAML_CONFIG_FILENAME);
export const loadEnvConfig = () => {
return [
() => yaml.load(readFileSync(baseFilePath, 'utf8')),
() => yaml.load(readFileSync(filePath, 'utf8')),
];
};
export const APP = {
host: '127.0.0.1',
port: '3000',
prefix: 'api',
version: 'v1',
};
|
使用
在根 module 中引入
1
2
3
4
5
6
7
8
9
10
11
12
13
14
15
16
17
18
19
|
import { Module } from '@nestjs/common';
import { AppController } from './app.controller';
import { AppService } from './app.service';
import { ConfigModule } from '@nestjs/config';
import { loadEnvConfig } from './config';
@Module({
imports: [
ConfigModule.forRoot({
isGlobal: true,
load: [...loadEnvConfig()],
}),
],
controllers: [AppController],
providers: [AppService],
})
export class AppModule {}
|
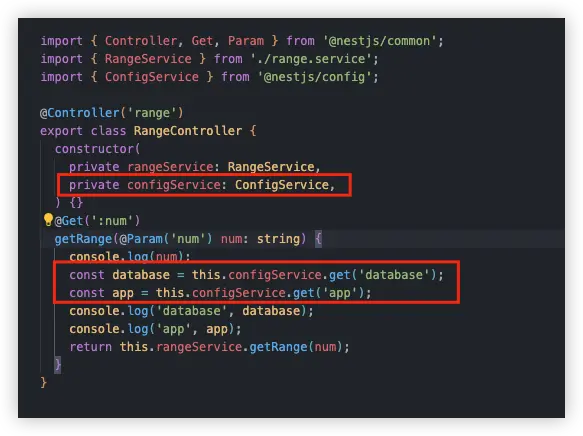
之后在需要的 controller 中引入即可
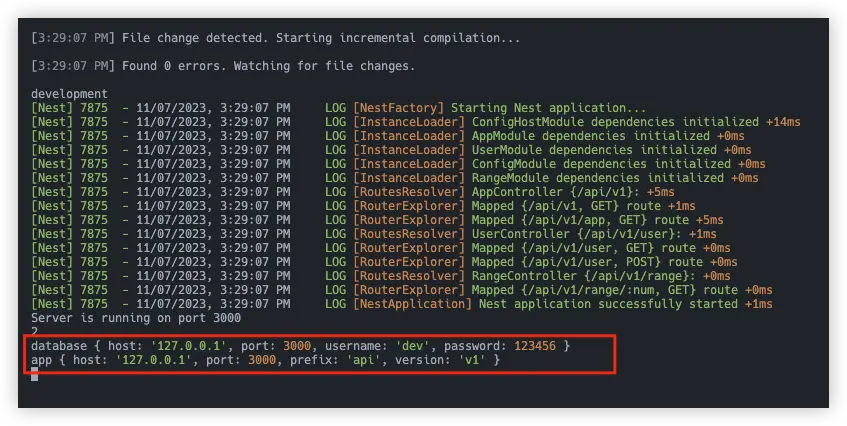
成功
变量校验
使用 joi 进行校验
TypeORM
ORM
对象关系映射,主要作用是把编程中的面向对象概念和数据库中的概念对应起来。
特点
- 方便维护
- 代码量少、对接多种库
- 工具多、自动化能力强
缺点
